
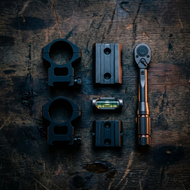
Scope Mounting Guide: Rings, Bases, Height and Torque
Posted by D&R Sports Center on Jun 14th 2026
Mounting is where a lot of otherwise-good rifle setups quietly fail. The scope is fine, the rifle is fine, but the zero wanders — almost always because of the mount. Get these steps right and your optic stays put.
Rings or a one-piece mount?
Separate rings on a base are lighter and common on hunting and bolt rifles. A one-piece cantilever mount is the standard for AR-pattern rifles and LPVOs because it sets the optic forward to the right eye position and keeps everything aligned in a single unit. Match the ring or mount diameter to your scope's tube — 1 inch, 30mm or 34mm.
The reason a cantilever exists is specific to the AR: the receiver is short and the optic needs to sit further forward than the rail above the receiver allows. A cantilever mount pushes the rings out over the handguard while still clamping only to the receiver rail, so you get correct eye relief without mounting anything to a handguard that may flex.
On a bolt rifle, two-piece rings on bases are lighter and let you position the scope freely along the tube. One-piece rings on a bolt gun buy you alignment at the cost of flexibility.
Choosing ring height
Use the lowest rings that let the objective bell clear the barrel and any handguard, with room for lens caps. Lower is generally better for a consistent cheek weld, but on an AR you often want a taller mount so the optical axis lines up with your eye in a shooting position. Height and cheek weld go together — solve them as one problem.
The practical test costs nothing: assemble the rifle with the scope sitting loosely in the rings, close your eyes, shoulder it naturally, and open them. If you are looking straight through the centre of the scope, the height is right. If you are craning your neck down or lifting your cheek off the stock, it is not.
Do that before you torque anything. Discovering the height is wrong after you have lapped rings and torqued to spec is an expensive lesson.
Leveling and alignment
- Level the rifle using the flat of the action or rail.
- Set the scope in the rings and level the reticle to the rifle — a small bubble level on the turret cap or a reticle-leveling tool makes this repeatable.
- Set eye relief: mount the rifle naturally at the magnification you use most and slide the scope until the picture is full and edge-to-edge, with no scope shadow.
Two refinements worth knowing.
Set eye relief at maximum magnification. Eye relief shortens as you zoom in on most variable scopes, so if you set it at 4x you may find yourself too far back at 20x. Set it where it is tightest and it will be comfortable everywhere else.
Reticle cant matters more than people think. A reticle tilted a couple of degrees puts no error into a 100-yard zero at all, which is why it goes unnoticed — but it introduces horizontal error that grows with every click of elevation you dial. At distance a canted reticle will push your shots sideways and you will chase a wind call that is not there.
Torque like it matters
Tighten ring and base screws to the manufacturer's spec with a quality torque wrench, in a cross pattern, a little at a time. Over-tightening can dent the tube or strip a fastener; under-tightening lets the scope shift under recoil. A drop of thread locker on base-to-receiver screws (not on ring caps) is cheap insurance.
Work the ring cap screws down gradually, alternating corners, so the cap descends evenly and the gaps on each side stay equal. Those gaps should be even when you finish — an uneven gap means the cap is clamping crooked and gripping the tube unevenly.
Ring screws and base screws usually take different torque values, and the ring figure is much lower than people expect. Look both up rather than assuming.
A canted base, if you dial for distance
A 20 MOA base tilts the scope slightly nose-down relative to the bore, which sacrifices some downward adjustment you will never use and hands it back as upward travel you will. If you intend to dial out past a few hundred yards, this is the cheapest way to avoid running out of elevation at the top.
For a general-purpose or hunting rifle zeroed at 100 yards and used with holdovers, a flat base is fine and simpler.
Check it again after fifty rounds
Fasteners settle. Re-check your torque after the first range session and again after any hard knock. This takes two minutes and catches the problem while it is still a loose screw rather than a mystery.
With the optic mounted and leveled, confirm zero at the range and record your dope — see how to zero a rifle scope. Choosing the scope itself first? Start with how to choose a rifle scope, pick your ring height with how to choose scope rings, and set your MOA or MIL units before you buy.